
Large-Format 24x48 Porcelain Shower Wall Tile: Prep & Lippage Control

Installing 24x48-inch rectified porcelain shower wall tile requires framing studs planed and shimmed to ANSI A108.02 flatness tolerances (<=1/8" variation in 10 feet, <=1/16" in 24 inches—twice as strict as standard tile), heavy-duty non-sag ANSI A118.15 Large & Heavy Tile (LHT) mortar troweled directionally for >=95% wet-area coverage, and mechanical wedge/spin lippage clips. Urban Design & Remodel (DOPL #10146123-5501, (801) 440-1952) installs 24x48 shower walls across Salt Lake County.
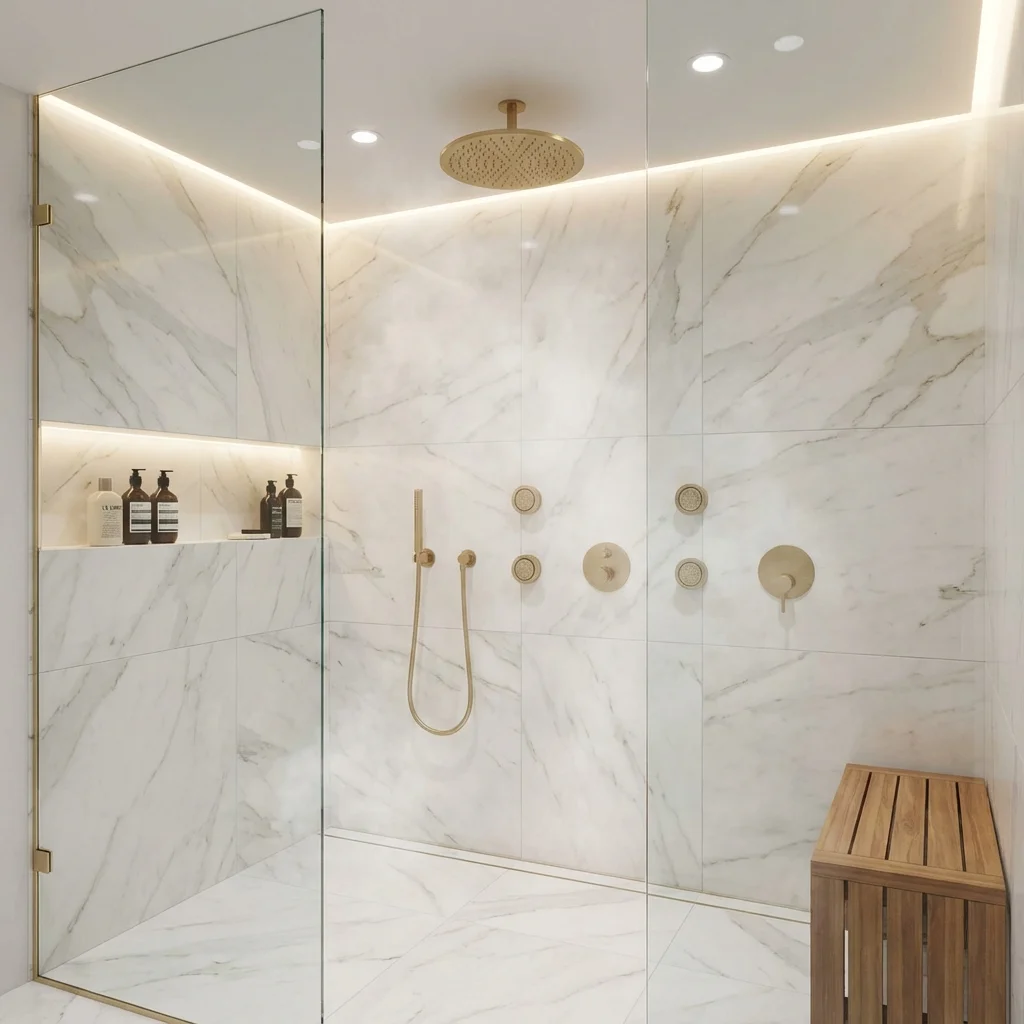
Few upgrades make a Salt Lake County primary shower look more like a five-star Park City resort than rectified 24x48-inch Italian or Spanish porcelain slabs stacked floor-to-ceiling with razor-thin 1/16-inch color-matched grout joints. Eliminating 85% of grout lines compared to classic 3x6 subway tile doesn't just create breathtaking continuous stone veining—it leaves Utah's notorious 18 GPG calcium scale almost nowhere to cling. Yet 24x48 porcelain tiles weigh roughly 36 to 42 pounds apiece and feature laser-cut square edges with zero forgiveness; slap them over bowed residential wood studs using cheap thinset, and LED ceiling grazing lights will expose unsightly stair-stepped 'lippage' shadows and hollow-sounding corners.
ANSI A108.02 Substrate Flatness: Why Bowed Wood Studs Ruin 24x48 Tile
For standard tiles with all edges shorter than 15 inches, industry code tolerates wall variations up to 1/4 inch over 10 feet. The moment any tile edge reaches 15 inches or longer—and especially at 48 inches—TCNA and ANSI A108.02 cut allowable substrate deviation in half: walls must be flat and plumb within **1/8 inch over 10 feet** and **1/16 inch over 24 inches**, with zero abrupt framing humps. You cannot 'build up' extra thinset mortar behind a 40-pound tile to fix a crooked wall without mortar slumping during cure. Before hanging a single sheet of Schluter-KERDI-BOARD or GoBoard, our carpenters set up cross-line green lasers, power-plane proud studs, sister warped lumber, and apply structural drywall/framing shims until a 6-foot aluminum straightedge sits dead-tight.
- Mandatory <=1/8" in 10 ft flatness tolerance prevents hollow corners and cracked slabs
- Rigid 1/2" foam backer boards (KERDI-BOARD/Wedi) shim plumb far cleaner than bowed drywall
- Check framing squareness inside 3-wall alcoves so vertical slab joints never taper into wedges
Directional Troweling, Back-Buttering & 95% Wet-Area Mortar Coverage
Under ANSI A108.5 wet-area standards, shower wall tiles require at least **95% mortar contact coverage** across the back of every tile with zero voids at corners or edges—otherwise trapped water vapor freezes or breeds discoloration, and drilling for 3/8-inch heavy frameless shower glass hinges cracks unsupported porcelain instantly! Achieving 95% coverage behind an 8-square-foot 24x48 slab is impossible if a setter swirls mortar in circles (which traps air pockets that block collapse). We flat-trowel ('back-butter') mortar into the rear waffle pattern of each 24x48 tile using a suction-cup handling rack, then comb ANSI A118.15 non-sag Large & Heavy Tile mortar (like Laticrete Tri-Lite or Schluter ALL-SET) across the wall using a 1/2"x1/2" or Euro-notch trowel strictly parallel to the **short 24-inch side** so air escapes in just 12 inches.
- Comb mortar ridges parallel to the 24" short edge—never swirled—so trapped air purges
- Use vibrators/beating pads + dual suction cups to collapse ridges to >=95% wet coverage
- Pop off the first set slab periodically to photograph and verify full wet mortar transfer
Mechanical Lippage Tuning Systems & Rectified 1/16" Joint Rules
Rectified porcelain tiles are mechanically diamond-sawn after kiln firing to exact millimeter dimensions with crisp 90-degree edges (unlike pressed cushioned-edge tiles). While kiln-fired 48-inch slabs still carry tiny natural thermal warpage—which is why TCNA prohibits 50% brick-offset running bonds on tiles >15", restricting offset to 33% max or clean stacked grids—mechanical leveling clips hold adjacent edges flush while mortar hydrates. Using Raimondi, Peygran, or Rubi 1/16-inch tension clips and wedges, we lock neighboring slab planes flush without lifting tiles off their mortar bed (which would create hollow voids if forced over unplumb walls!). Once cured 24 hours, clips snap cleanly below the joint depth before packing fine-aggregate grout.
- Never install 24x48 tile in a 50/50 brick pattern; use stacked vertical/horizontal or <=33% offset
- Mechanical lippage clips fine-tune edge alignment—they never substitute for plumb framing
- Maintain minimum 1/16" grout joints + 1/8" soft silicone perimeter movement joints
Diamond Wet-Core Valve Cutouts & Mitered vs. Schluter Niche Edges
Cutting shower valve openings, showerhead drop-ears, and recessed 12x24 shampoo niches out of ultra-dense 9mm–10mm porcelain slabs requires dedicated rail wet saws and diamond hole-saw core bits cooled continuously with water. Dry-grinding rough square holes with an angle grinder creates micro-fractures at sharp corners that propagate into hairline slab cracks months later when walls expand and contract; every rectangular niche cutout inside a single slab must have its four corners pre-cored with a 3/8-inch round diamond bit to relieve stress! On outside bench, curb, and niche corners, choose between precision 45-degree beveled epoxy-filled 'mitered' porcelain edges for a solid-stone monolith look or brushed stainless/matte-black Schluter-FINEC/JOLLY metal trims.
- Pre-drill round relief holes at interior niche cutout corners to prevent thermal stress cracks
- Diamond wet-coring prevents chipped factory glazes around shower valves and glass clamps
- Align recessed shampoo niche heights seamlessly with horizontal 24" slab joint lines
24x48 Large-Format vs. Standard Subway Tile Shower Comparison
| Installation Metric | 24x48" Rectified Porcelain Slab | 12x24" Standard Porcelain | 3x6" / 4x12" Subway Tile |
|---|---|---|---|
| Wall Plumb/Flatness Tolerance | <=1/8" in 10 ft (mandatory laser prep) | <=1/8" in 10 ft | <=1/4" in 10 ft |
| Linear Feet of Grout (100 SF Wall) | ~75 linear feet (85% less scrubbing!) | ~150 linear feet | ~530 linear feet |
| Tile Setting & Prep Labor (UT) | $18 – $28 / sq ft (2-person slab crew) | $13 – $18 / sq ft | $14 – $20 / sq ft (layout intensive) |
| Material Waste Factor to Order | 20% – 25% (full-slab cut geometry) | 12% – 15% | 10% – 12% |
Grant Helmer's Utah Field Pro-Tip (DOPL #10146123-5501)
When planning 24x48 wall tile in a Salt Lake remodel (DOPL #10146123-5501), measure your shower ceiling height and back wall width BEFORE buying tile! A 60-inch standard tub/shower back wall splits awkwardly if centered poorly—leaving skinny 6-inch slivers—whereas centering one full 48-inch slab flanked by two balanced 6-inch panels (or running two 30-inch cut slabs vertically to an 8-foot 96-inch ceiling with ONE horizontal seam) looks custom-tailored.
Frequently Asked Questions: Large Format 24x48 Shower Wall Tile Installation
Can 24x48 large-format tile be used on the shower floor pan as well?
Only with a wall-to-wall single-plane linear drain AND provided the matte porcelain carries an ANSI A326.3 wet DCOF slip rating >= 0.42. You cannot pitch a rigid 24x48 slab four directions toward a traditional center round drain without cutting ugly diagonal 'envelope' relief lines.
Why do installers charge more per square foot for fewer, bigger 24x48 tiles?
Fewer tiles never means faster labor. Laser-planing wood framing to 1/8" flatness, hoisting 40-lb slabs with two-person suction racks, back-buttering + directional troweling heavy LHT mortar, and precision rail-sawing cutouts takes significantly higher skill and time than setting lightweight 12x24 tile.
Should 24x48 shower wall tiles be stacked horizontally or vertically?
Stacking 24x48 slabs vertically (48" tall) elongates standard 8-foot ceilings cleanly with exactly two full courses (96") and zero tiny ceiling slivers, while horizontal stacking widens narrow 36-inch side walls visually. Both work beautifully in stacked grids.
Will ceiling spotlights make tiny lippage look worse on 24x48 tile?
Yes! Placing recessed ceiling cans within 6 to 10 inches of a tiled shower wall casts harsh vertical 'wall-grazing' shadows that magnify even 1/32" factory tile bow. Keep shower downlights 18"–24" away from tile walls.
Related Utah Roofing, Bathroom & Remodeling Resources
Schedule Your Salt Lake County & Wasatch Front, UT Inspection or Design Quote
Direct owner consultation with Grant Helmer (Utah DOPL #10146123-5501) — zero high-pressure sales.